


I was editing this post and somehow I managed to delete
it, D'oh! so I am re-writing it, hopefully, it will still make
sense. This is a long post, so I hope I don't bore you to sleep,
you may want to go and grab a cuppa ;o)
I have had a few people ask me about colouring with lead
or graphic pencils, I use them for black and white challenges
as I don't have any grey copics. These pencils offer a great
alternative and give a great result. I must say however, that
I am by no means an expert in this area, this is just the method
that I use and it works for me :oD
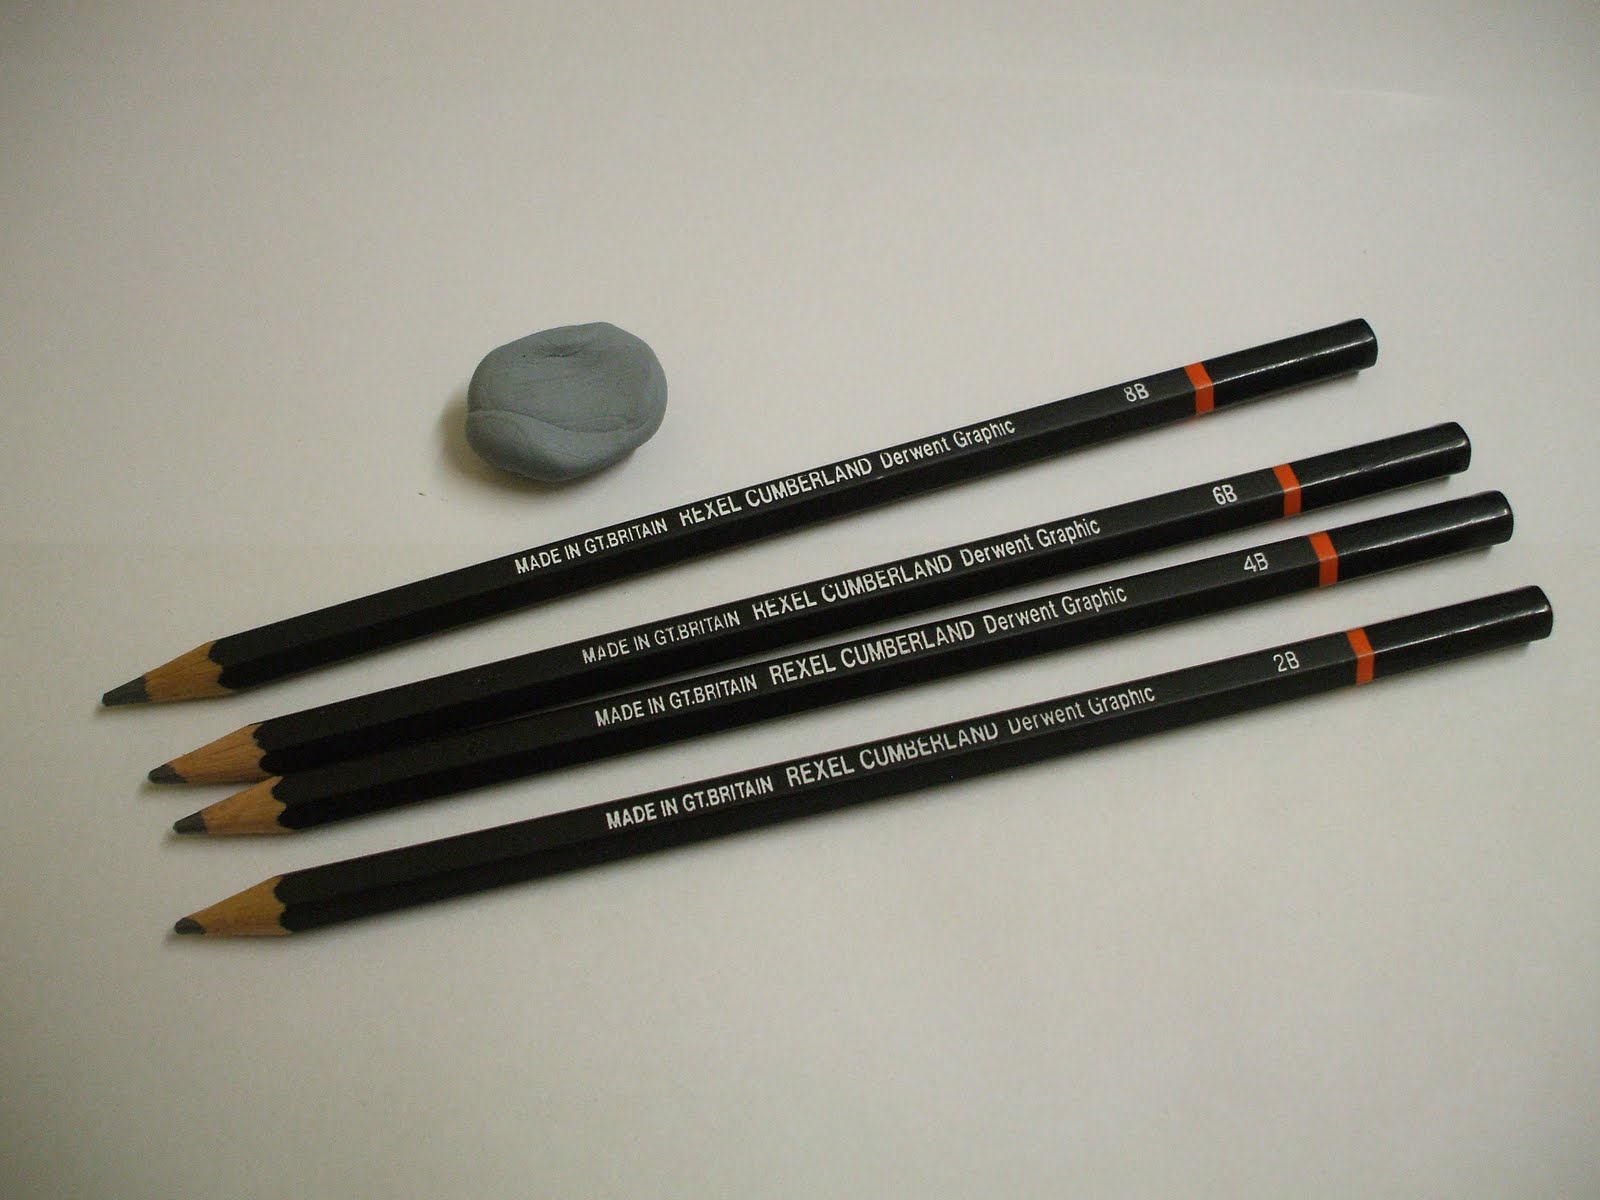
So I have 4 pencils here, I use Derwent Graphic pencils in 2B,
4B, 6B and 8B. I also use a kneadable rubber, these can be
brought from most art supplies and some newsagents.
The difference in these pencils, is depth of shade and softness,
so the softer the pencil, the darker the shade!
You do not have to use the Derwent brand of pencils (these are
just my personal preference), any brand should be sufficient as
long as they offer these shades.
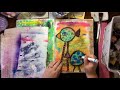
I have started by stamping the images, it doesn't matter which
ink you use, but black will look best. For the lighter skin tones
I start with 2b and darker skin tones I use 4B. I just scratch a
little colour on and then rub it with my index finger to kind of
smudge it and get an even skin tone, you can add (or take away
colour with your rubber) til you get the desired result...

add in cheeks, eyeshadow, any other details...

Then I start the hair and I go from light to dark, I leave an area
uncoloured to show hightights in the hair...

...and again, I shade from lightest to darkest using 2B, then 4B,
6B and 8B, you can always add or take colour til you get your
desired result. I do not rib these areas with my finger to blend
as I find that a few scratchy lines here and there can add texture
to the hair.


and then colour the clothes in much the same way

Here I want to show that different shades of these pencils, I
have shaded from darkest to to lightest (so 2B, then 4B, then,
6B and 8B), using the same amount of pressure on each pencil
and you can see that there is quite a bit of dofference in the depth
of colour. I'd also to show that the kneadable rubber can be used
to take colour away, so you can use it to create patterns too...

I hope that helps/inspires any of you to have a play with these
pencils, they really are alot of fun and offer an alternative to
other colouring methods.
Thanks for stopping by!
Please feel free to leave a comment, I really do appreciate your
thoughts :oD
Happy Stamping!
Peta xoxo


Im soooo very glad you had not lost this tutorial Peta, this was so brilliantly done... especially because I got to have a private lesson with you, xxxxxxxxxxxx
ReplyDeleteawhhh i want a private lesson :( Peta teach me teach me!!! First does it work with #2 pencils LOL!!???? I need to see if our local craft store has these.If i get a chance tomorrow i'll take a peek.Girl don't delete this anymore this is brilliant!!!!((hugs))RubyM:)
ReplyDeleteyay !!! woohooo awesome tutorial glad its back.
ReplyDeleteOH your colouring is amazing Peta
ReplyDeleteLove your explanation of colouring with these pencils, it was a great tutorial. Tks for sharing.
ReplyDeleteOh wow you are very good at this!!! Coloring is amazing! Great job..
ReplyDeletehugs, Janiel
wow a great tutorial aand so very useful.thanks
ReplyDeletelove debbie xxx